
This blog post explains how to extend the Machineface 3D printer UI with a custom UI element that interacts with HAL. For this purpose, this article explains the core concepts of HAL remote.
The blog post is a continuation of Controlling TP-Link HS100/110 Smart Plugs with Machinekit.
HAL Remote
HAL remote is a remote API for the Machinekit HAL (Hardware Abstraction Layer). HAL bases on reusable assets called components. These components can either be real-time or userland components.
HAL remote extends this concept by adding HAL remote components. HAL remote components do not have an instance handled by HAL. Instead, they are instantiated via a remote API.

This concept allows mapping HAL remote components into the UI. For example, a HAL pin is represented by a button UI element. When pressing the button in the UI the pin value automatically changes in HAL.
The API or middleware behind HAL remote is called Machinetalk. It uses following de-facto standard technologies:
- ZeroMQ for messaging
- Protobuf for message serialization
- mDNS/DNS-SD for service discovery
The remote UI for Machinekit Machineface uses QtQuickVcp library. QtQuickVcp is the Qt/QML language binding for Machinetalk.
For now, I will not go into more details about Machinetalk.
Development setup
To extend Machineface, you need a local copy of the Git repository. I recommend you to start by forking the Machineface repository on GitHub.
Then check out your forked repository locally.
git clone https://github.com/yourusername/Machineface.git
For editing the Machineface user interface I prefer using Qt Creator. Qt Creator comes with the Qt SDK.
You do not necessarily need to install the Qt SDK and to build QtQuickVcp. However, it helps when developing QtQuickVcp UIs. For install instructions, please take a look at the README.
Additionally, I prefer working with qmllive. A live coding environment for QML. This tool automatically reloads the UI source code whenever the file system is modified.
If you plan to use any other text editor you need to edit the Machineface source code on the Machinekit target device. Furthermore, you need to use configserver to remotely deploy the files to the Machinekit Client
Adding a remote component to HAL
Once we have a working development setup, it is time to modify the HAL configuration. For this purpose, we need to extend the setup_smartplugs function created in the last blog post.
Remember that we used a Python HAL configuration. The code that creates the HAL remote component for controlling the smart-plugs looks as follows.
rcomp = hal.RemoteComponent('smartplug-control', timer=100)
rcomp.newpin('power-enable', hal.HAL_BIT, hal.HAL_IO)
rcomp.newpin('fan-enable', hal.HAL_BIT, hal.HAL_IO)
rcomp.newpin('power', hal.HAL_FLOAT, hal.HAL_IN)
rcomp.newpin('energy', hal.HAL_FLOAT, hal.HAL_IN)
rcomp.ready()
The first line creates a new HAL remote component and assigns it the rcomp variable.
The first argument 'smartplug-control' of the Python class initializer is the name of the component.
The timer argument specifies how often the remote component values are sent to the remote clients.
In the following lines, we add new HAL pins to the component.
- power-enable - to toggle the power plug
- fan-enable - to toggle the fan plug
- power - for monitoring the power consumption
- energy - for monitoring the energy consumption
The ready function call tells the haltalk HAL remote service provider, to release the remote component.
Once created, it is possible to use the HAL remote component like any other HAL component.
For more details, please take a look at the complete source code on GitHub.
Adding a HAL remote component to Machineface
Next, it is time to add new UI elements and a new HAL remote component to Machineface.
The ./Machineface directory inside the Machineface repository contains all UI components of the Machineface UI.

QML is organized into .qml files. Each file contains one root component with the name of the file. For example, LightControl.qml contains the LightControl QML component.
The DisplayPanel component contains the display panel on the right side of Machineface. An ideal place to add a new control element.
Moreover, the DisplayPanel already contains some HAL remote component based controls, namely:
FanControlTemperatureControlLightControl
These components are a perfect starting point for adding new control elements to Machineface. I encourage you to take a look at these components if you interested in learning how to add new controls to Machineface.
Based on these components I added a new QML file called SmartplugControl.qml. I will now go over the most important parts of the code. I recommend you to take a look at the complete source code on GitHub.
First of all, we need a HAL remote component.
import Machinekit.HalRemote 1.0

...

HalRemoteComponent {
    id: halRemoteComponent
    halrcmdUri: halrcmdService.uri
    halrcompUri: halrcompService.uri
    ready: (halrcmdService.ready && halrcompService.ready) || connected
    name: root.componentName
    containerItem: container
    create: false
    onErrorStringChanged: console.log(componentName + " " + errorString)
    onConnectedChanged: root.wasConnected = true
}
The first line imports the HalRemote QtQuick module.
The HalRemoteComponent represents the HAL remote component in QtQuickVcp. The halrcmdUri and halrcompUri properties specify the ZeroMQ service URIs. In this case, the component references to properties in a parent object.
When both services are ready the ready property is set to true. The component tried to connect to a remote Machinekit instance.
Also important is the name property, since it has to match the name of the remote component in HAL.
The create property tells QtQuickVcp to throw an error if no remote instance of the component exists.
You may wonder how the HalRemoteComponent matches pins to UI controls such as buttons. The QML item passed to the containerItem property is searched for HalRemote.Controls when the component becomes ready.
In the container item we can find following controls:
HalSwitch {
    name: "power-enable"
    halPin.direction: HalPin.IO
}
and
TextField {
    Layout.preferredWidth: root.width * 0.4
    readOnly: true
    text: energyPin.value.toFixed(2) + "kWh"

    HalPin {
        id: energyPin
        name: "energy"
        type: HalPin.Float
        direction: HalPin.In
    }
}
The HalPin item is a non-visible QML item representing a single HAL pin. name, type and direction have the same meaning as for regular HAL pins. Note that direction In means that a signal can drive this HAL pin.
The value property of the energyPin is then used as a source for the text property of the TextField.
The HalSwitch component is a combination of the Switch UI element and a HalPin. The checked property of the switch binds automatically to the HAL pin with the name power-enable.
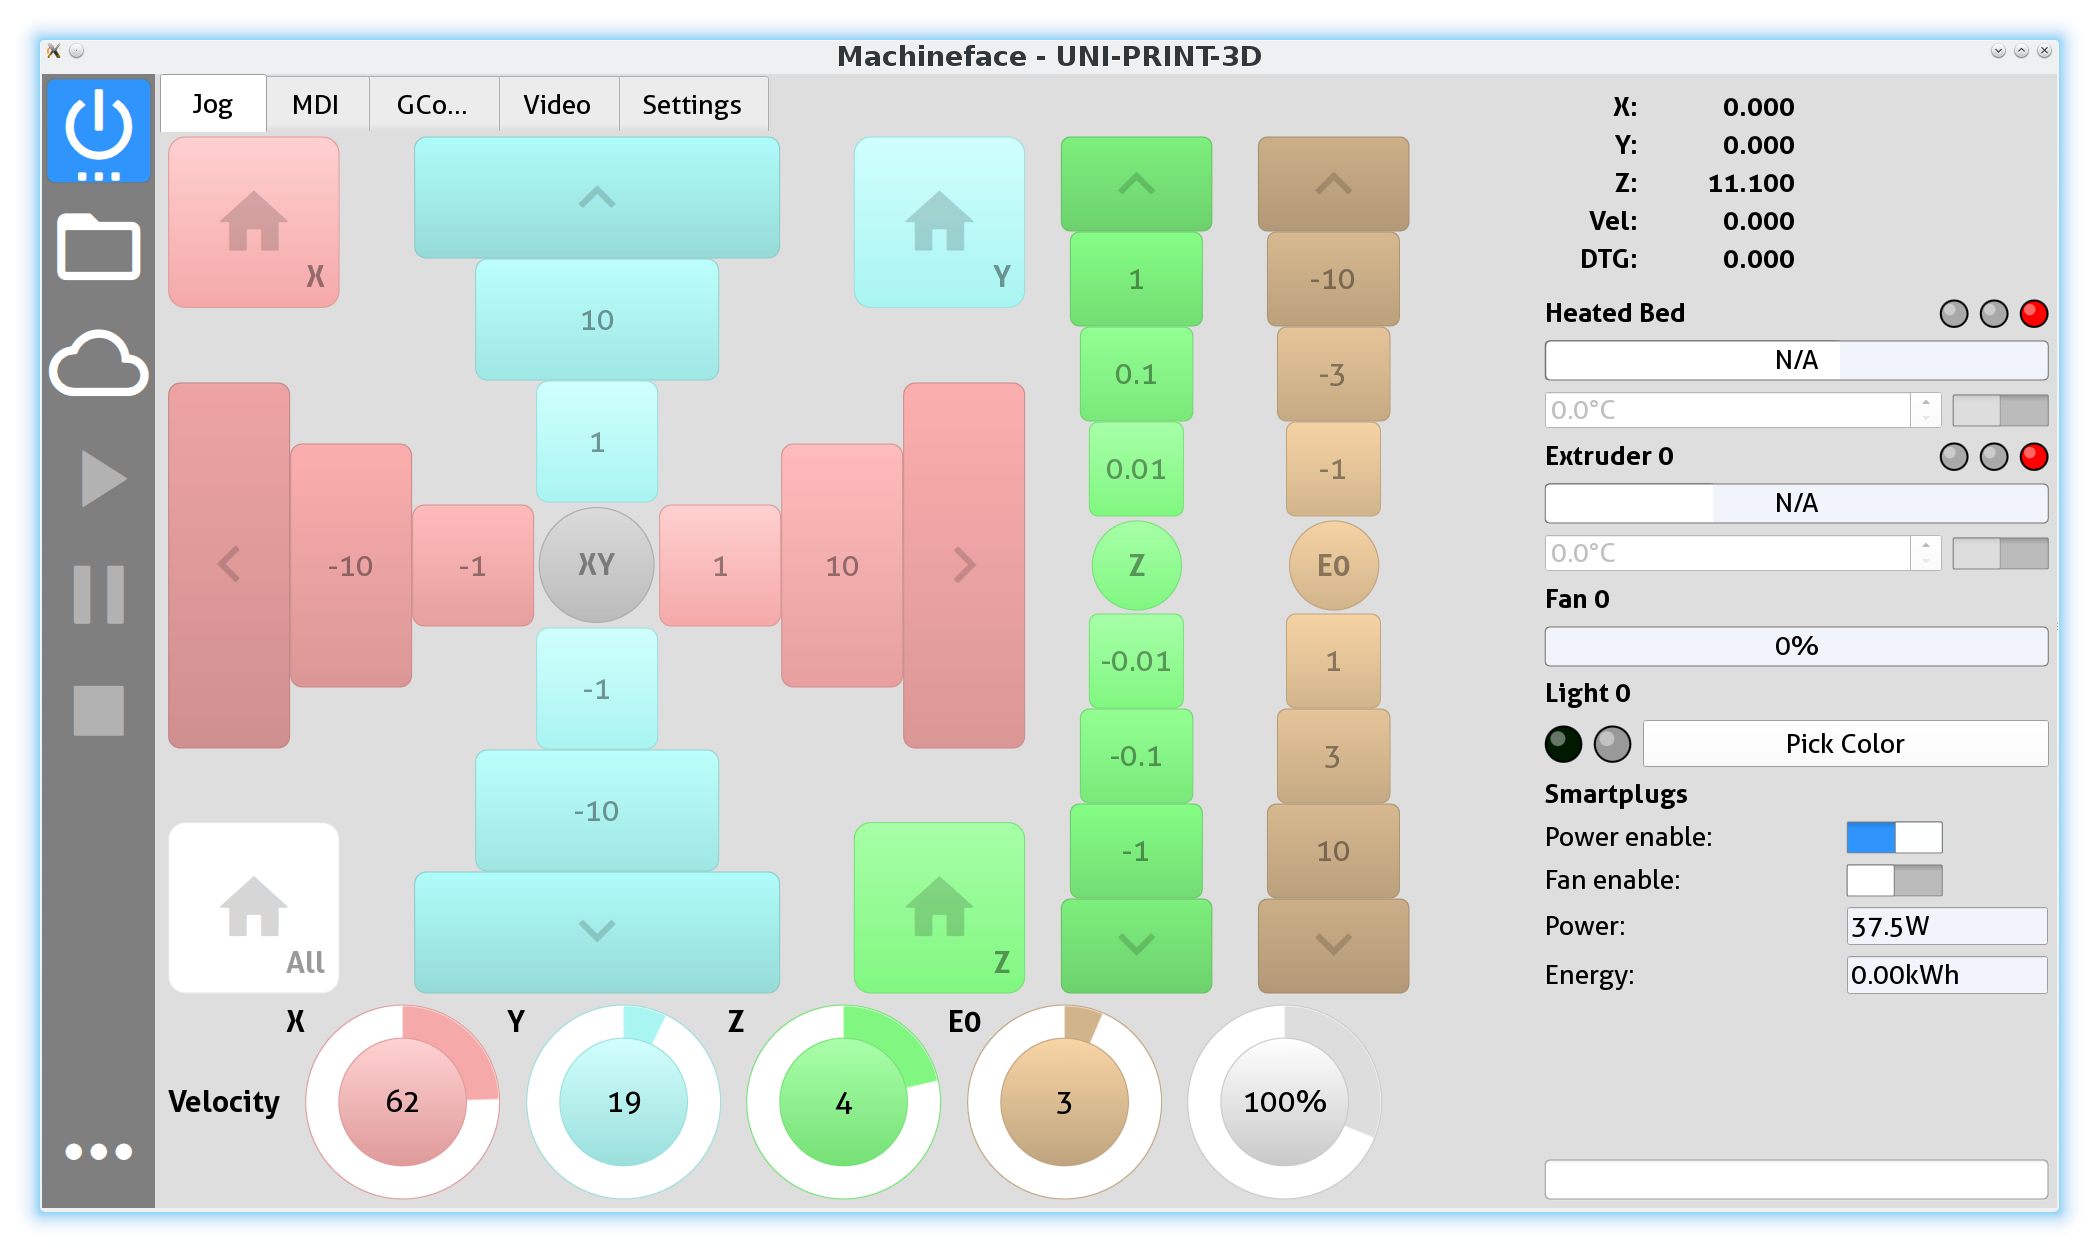
The resulting control element looks as follows:

I cannot go into full details of how to implement a QtQuick/QML component here. If you are interested in this topic, I recommend you starting with the QML tutorial.
Summary
Concluding, this blog article explains how to extend Machineface with a new UI control. Furthermore, it explains some concepts of HAL remote and QtQuickVcp.
The full source code of the modified Machineface and UNI-PRINT-3D configuration is available in the home branch of the repositories.
I hope this blog post has been useful for you. If you have questions about HAL remote or want to give feedback, please comment on this post.
Your,
Machine Koder
Comments 3
Hi there, I enjoy reading all of your post.
I like to write a little comment to support
you.
Good post, keep
The contents are masterwork.