 7 minutes read
This article is about porting the Turnigy Fabrikator Mini from HobbyKing to Machinekit. It explains the basics of porting a new 3D printer to Machinekit. For this purpose, the open hardware CRAMPS cape for the BeagleBone Black is used.
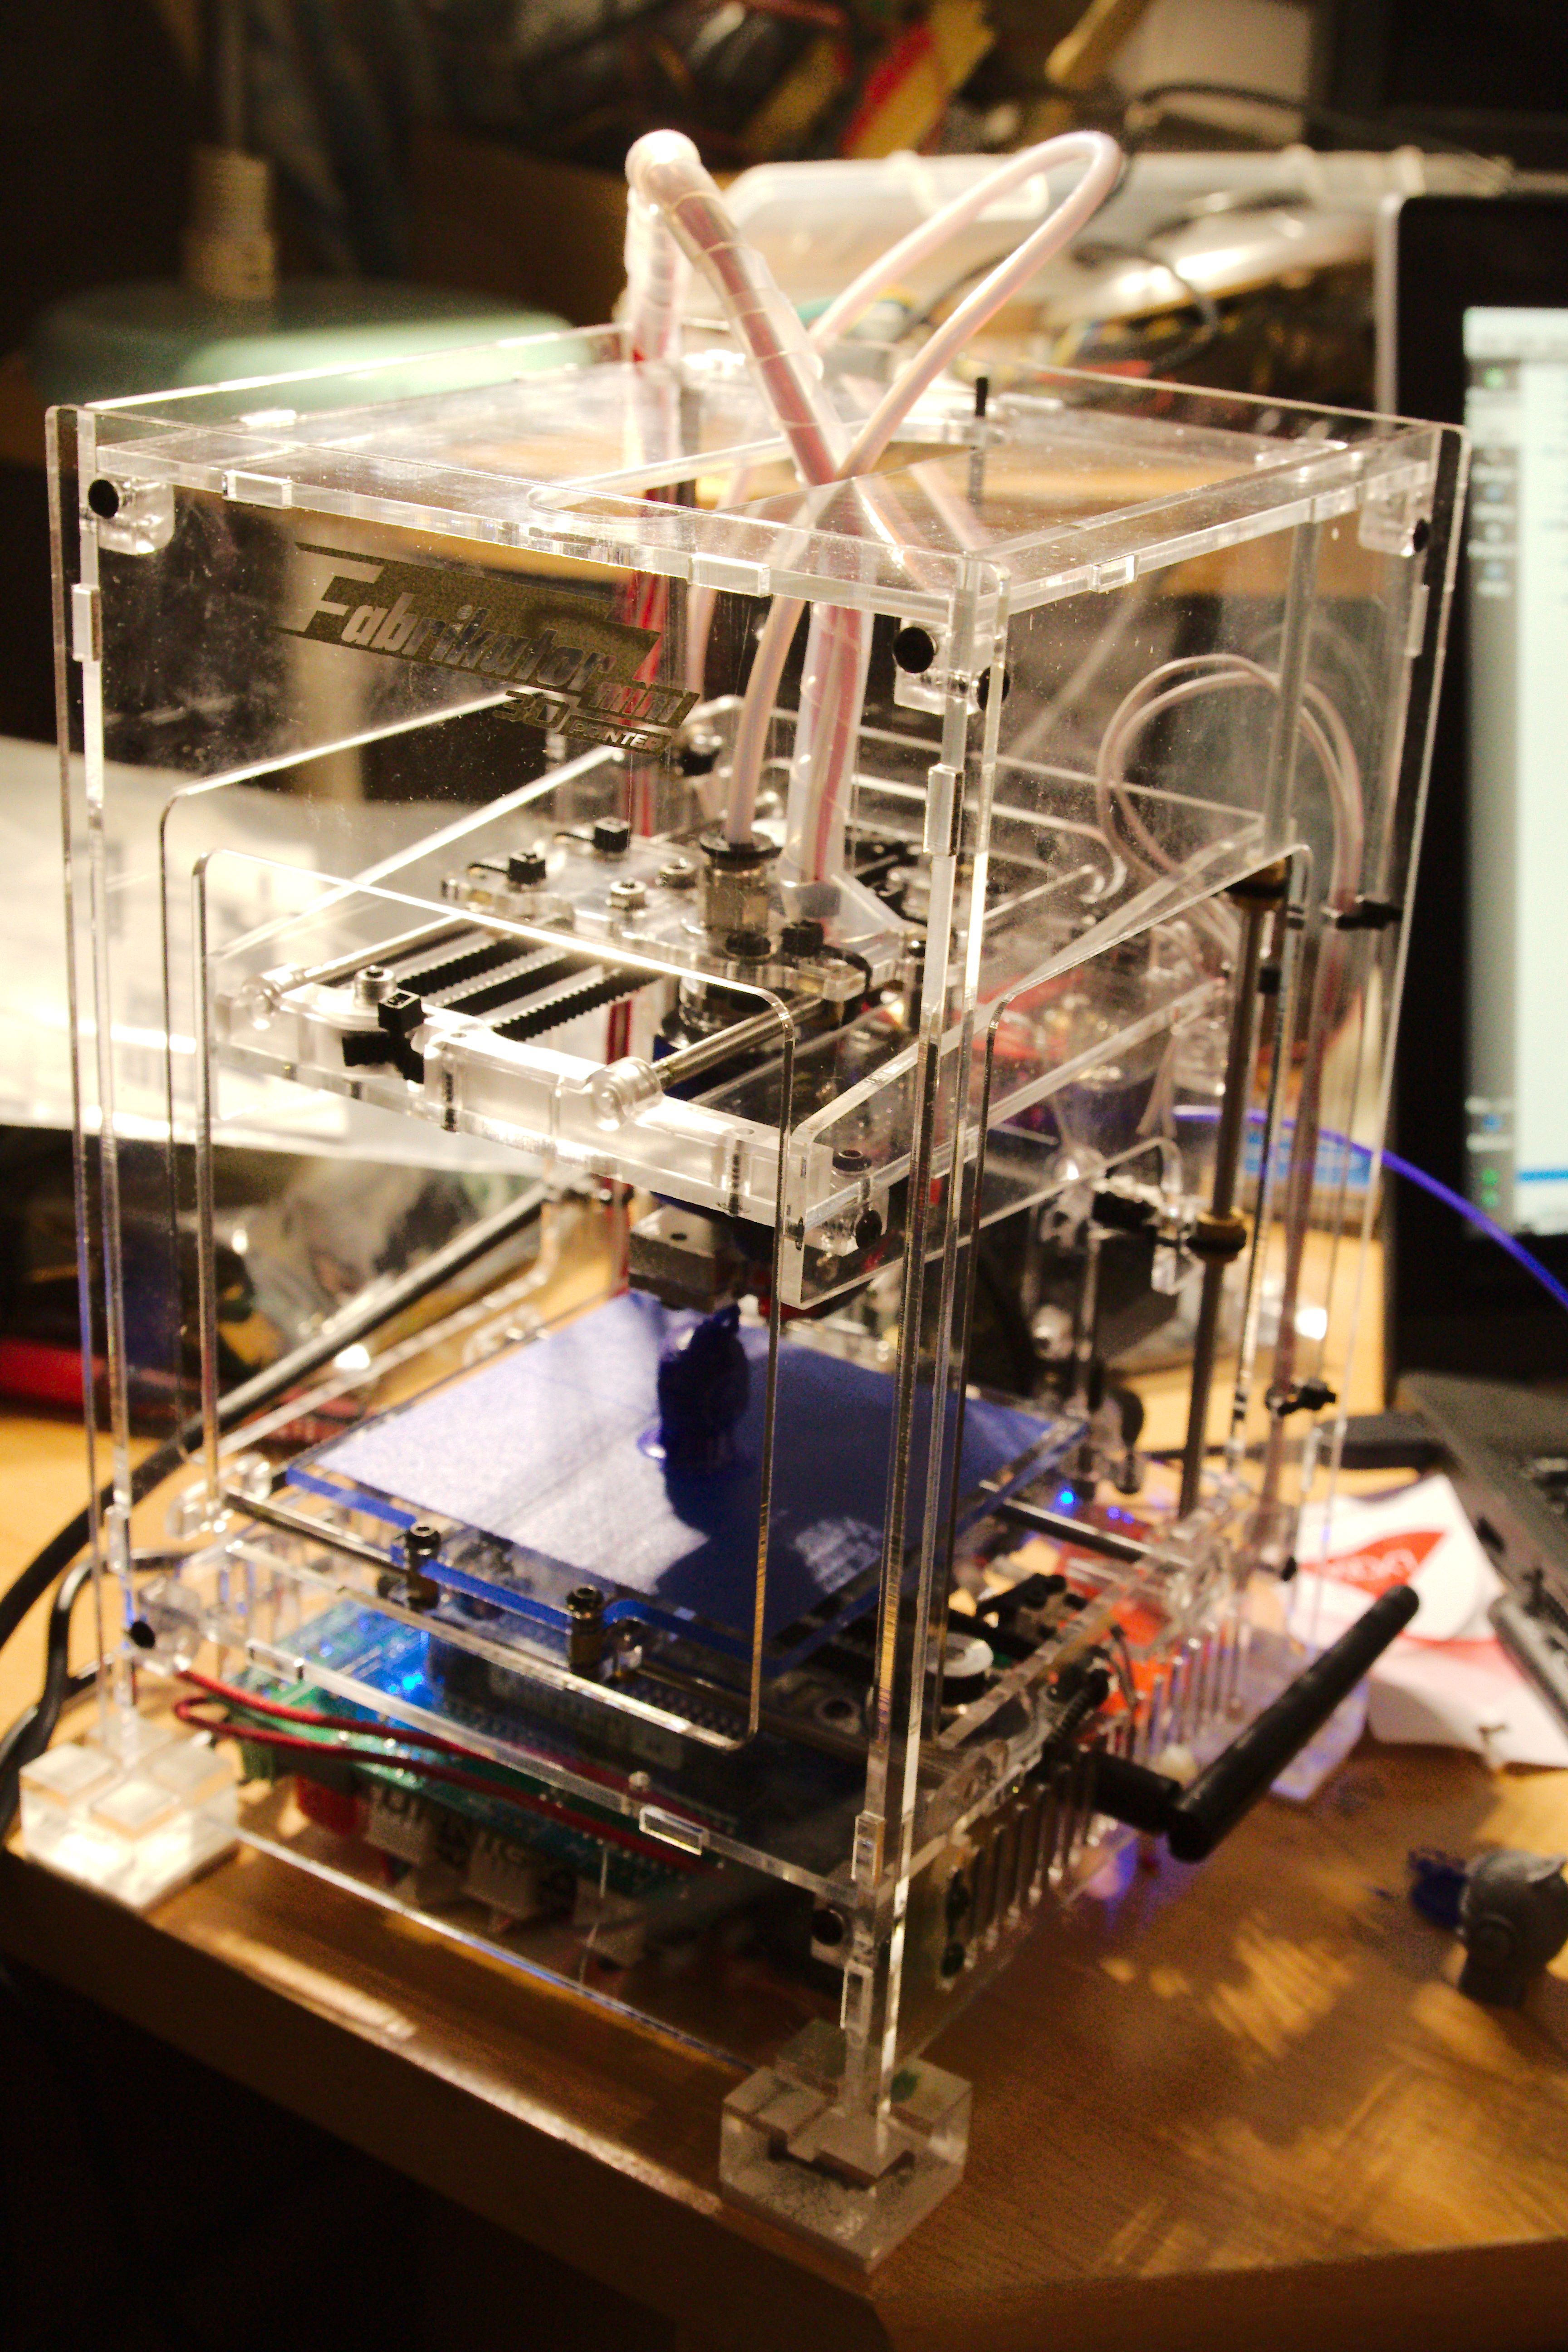
The Turnigy Fabrikator Mini / TinyBoy
I recently stumbled upon a review about a mini 3D printer for 160€ on heise.de. Since I was looking for a small and portable Machinekit demonstration device I immediately ordered one from HobbyKing.
Unfortunately, the 3D printer seems to be always in back order, so it took ~2 months for the delivery.
The Fabrikator Mini, also known as TinyBoy, has the following specs:
- Size: 15cm(W) x 15cm(D) x 22cm(H) (excl. filament holder)
- Print size: 80mm x 80mm x 80mm
- Filament: 1.75mm PLA
- Power supply: External 12V 6A Transformer
- Board: mega2560 ramps1.4 with 4 A4988 stepstick
- Software: Repetier-Host

Additional interesting facts about the 3D printer are:
* The design is open source
* A version 2 has been funded on Indigogo.
Replacing the Hardware
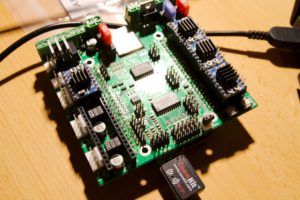
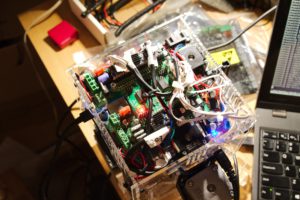
The 3D printer comes with a RAMPS board + Repetier host out of the box. Therefore, it turned out to be an easy task to replace the included hardware with a CRAMPS cape and BeagleBone Black.
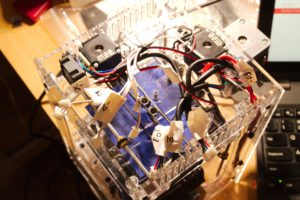
For this purpose, I flipped the Fabrikator Mini over and labeled all the connections using white tape and a black marker. The silk screen on the RAMPS board does help with this task.
The next step is to unplug all connectors and to remove the RAMPS board from the printer.
The CRAMPS board has approximately the same size as the RAMPS board. However, including the BBB the CRAMPS board is slightly thicker than the RAMPS board. Additionally, I had to modify the case of the Mini Fabrikator for the WiFi antenna and USB cable.
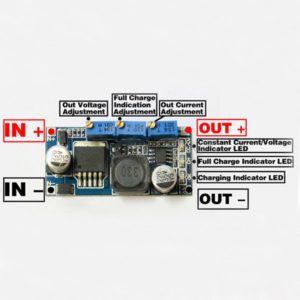
The CRAMPS board does not feature a power supply for the BBB. Therefore, one also needs to add a dc-dc converter. I used a cheap pre-assembled module which is available from various vendors on eBay:
"DC-DC Buck Converter Module LM2596 Constant Current & Voltage Adjustable Module".
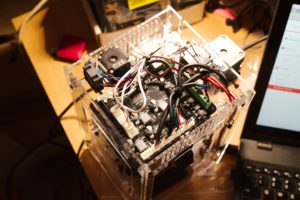
Thanks to the labeled wires it was not hard to reconnect the 3D printer to the CRAMPS board. The CRAMPS schematic helped with this task. I only needed to add connectors to the wires of the housing and hotend fan.
The only difficulty I experienced while connecting the CRAMPS board was how to connect the power supply. The CRAMPS Cape supports multiple sources of energy for motors, heated build platform, extruders and auxiliary devices. Therefore, one has to connect all the power inputs of the board with the 12V power supply that comes with the 3D printer.
Flashing Machinekit on the BeagleBone Black
The easiest way to setup Machinekit on the BeagleBone Black is to use Machinekit Debian images by RCN.
I will not go into details about flashing the images here. Please take a look at the Machinekit documentation.
Adapting the Machinekit configuration
Once the hardware is ready and we have installed Machinekit on the BeagleBone Black it is time to create a Machinekit configuration.
As always, I recommend starting from an existing Machinekit configuration. Usually one can find existing example configuration in the Machinekit source tree. However, there are no configurations in there using the Python FDM modules. I plan to push them shortly.
For now it is best to start of with one of the following configurations:
The latter one is slightly more suitable since it already uses the CRAMPS board. I ended up intermixing both configurations since the UNI-PRINT-3D configuration contained the most recent FDM libraries.
Directory structure
I based the new configuration the MendelMax-CRAMPS configuration. First of all I renamed the following files:
- CRAMPS.ini -> fabrikator-mini.ini
- mendelmax.py -> fabrikator_mini.py
Furthermore, I copied the fdm folder from the UNI-PRINT-3D configuration and removed the config folder.
.
??? cramps2_cape.bbio
??? cramps.py
??? fabrikator-mini.ini
??? fabrikator_mini.py
??? fdm
??? launcher.ini
??? pru-stepper.var
??? README.md
??? rs274ngc.var
??? run.py
??? storage.ini
??? tool.tbl
fabrikator-mini.ini
First of all, I adapted the machine parameters in the fabrikator-mini.ini. The Fabrikator Mini does not come with a list of configuration parameters. Therefore, I had to look up the information on the internet and found a matching
Marlin Tinyboy configuration.
The relevant information is:
- X/Y axis steps/mm:
201.01 - Z axis steps/mm:
6366.88 - Extruder steps/mm
97.11
First of all, I changed [EMC]MACHINE to Fabrikator Mini CRAMPS.
Next, I changed the parameter [HAL]HALFILE to fabrikator_mini.py.
Then one needs to adapt the [AXIS_n] parameters. I left most of the configuration file untouched and edited following parameters:
AXIS_0
MIN_LIMIT = -40MAX_LIMIT = 40HOME_OFFSET = 40SCALE = 201.01
AXIS_1
MIN_LIMIT = -40MAX_LIMIT = 40HOME_OFFSET = 40SCALE = 201.01
AXIS_2
MIN_LIMIT = -5.0MAX_LIMIT = 80.0SCALE = 6366.88
Then I added parameters to fix the "PRU pin hunting" problem to each AXIS.
# PID tuning params for
# workaround for PRU dir pin problems
DEADBAND =              0
P =                     90
I =                     0
D =                     0
FF0 =                   0
FF1 =                   1
FF2 =                   0.00005
BIAS =                  0
MAX_OUTPUT =            0
MAX_ERROR =             0.0005
Next, I modified the [EXTRUDER_0] section:
[EXTRUDER]THERMISTORis the same as on MendelMax with E3D v6epcos_B57560G1104.[EXTRUDER_0]SCALE = -97.11
The last thing I needed to modify in the INI file is the [FDM] section:
[FDM]
VELOCITY_EXTRUSION_ENABLE = 1
NUM_EXTRUDERS = 1
NUM_FANS = 0
NUM_LIGHTS = 0
HAS_HBP = 0
storage.ini
The storage.ini is used by the hal_storage component to expose run-time changeable configuration parameters. In this file, we need to change the extruder settings to match the parameters found in the manual that comes with the printer.
[E0]
retract-len = 4.5
filament-dia = 1.75
retract-vel = 40.0
fabrikator_mini.py
The fabrikator_mini.py file is the main HAL configuration file of the 3D printer.
First of all, I adapted the file to use import fdm.config instead of import config. The reason for this change is that the Python FDM library is now structured differently.
Next, I added thread='servo-thread' to the setup_stepper functions. This modification is necessary due to the "PRU pin hunting" fix.
Then, I moved hal.addf('motion-controller', 'servo-thread') after hal.addf('motion-command-handler', 'servo-thread') to correct the wrong execution order.
Since the E3D hotend comes with a cooling fan, I had to modify the extruder setup function. Therefore, I added hardware.setup_exp('exp%i' % i) before the create_temperature_control call.
Additionally, I added hasHbp = c.find('FDM', 'HAS_HBP') in the beginning of the file. The variable is then used to disable the heated bed for this 3D printer.
If you want to create a Machinekit configuration for your 3D printer you can now use the newly created configuration file. The modification above should help to make setting up a new 3D printer easier.
cramps.py
The cramps.py contains the hardware and pin configuration of the machine. If you create a new Machinekit configuration, it is very likely that you will need to modify this file.
In this file I added the following code snipped:
def setup_exp(name):
    hal.newsig('%s-pwm' % name, hal.HAL_FLOAT, init=0.0)
    hal.newsig('%s-pwm-enable' % name, hal.HAL_BIT, init=False)
This function is used in the fabrikator_mini.py to create the exp (for expansion) signals.
Furthermore, I needed to modify the PWM and limit pin configuration in the setup_hardware function. In particular, I reassigned FET 5 and FET6 of the CRAMPS board to stepper and hotend cooling fans. Additionally, I had to change the invert pin of the limit switches.
run.py
This file starts the Machinekit configuration. In this file I needed to change the name of the ini file supplied to linuxcnc and the -n name argument of the configserver.
Automatically start the Machinekit configuration
Per default, the Machinekit configuration does not start when booting the machine. To change this behavior we have to tell systemd to start the application at boot.
First, we need to create a new Systemd service:
sudo nano /etc/systemd/system/tinyboy.service
With the following content:
[Unit]
Description=Starts my the Machinekit configuration
After=syslog.target network.target ap-hotspot.service
[Service]
Type=simple
ExecStart=/usr/bin/python /home/machinekit/repos/Fabrikator-Mini-CRAMPS/run.py
User=machinekit
LimitMEMLOCK=33554432
[Install]
WantedBy=multi-user.target
Next, we can test and start the service:
sudo systemctl daemon-reload
sudo systemctl start tinyboy.service
Wait a few seconds and check the status of the service:
sudo systemctl status tinyboy.service
After you have approved that everything works fine its time to enable the service to be started at boot:
sudo systemctl enable tinyboy.service
The configuration should now start at every system boot.
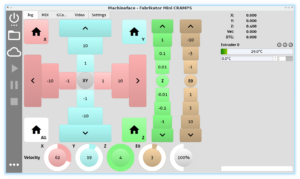
Install and run Machineface
As user interface for the Fabrikator Mini, we can use Machineface. It is a generic 3D printer UI for desktop and tablets.
First, we need to clone the repository on the BeagleBone:
cd
git clone https://github.com/machinekdoer/Machineface.git
The UI is then ready to be deployed by configsever.
Once this step is completed, it is time to download and start the MachinekitClient. The most recent builds can be found here.
Once started you should be able to discover the Machinekit instance on the network. In some cases, you need to configure the host address manually. E.g. if you want to use the BeagleBone USB ethernet you need to enter 192.168.7.2 in Unicast mode.
Cura configuration
I will not go into details about how to create a Cura configuration for Machinekit. You can find details about this task in a recent blog post.
You can find a working configuration on my GitHub page.
Summary
In this blog post, I have described how to port the Turnigy Fabrikator Mini to Machinekit.
The information may not only be useful if you have the same 3D printer but also if you plan to create a new Machinekit configuration for another printer.
Additionally, it also explains how to start a Machinekit configuration at boot and how to install Machineface.
You can find the resulting configuration on Github.
I hope this blog post was interesting for you and I would like to hear you feedback.
Your
Machine Koder